
How to Wet Mold Leather Into a Custom Tool Sheath (With Cheap Tools)
If you've ever wanted a sheath, holster, or case that fits your gear exactly — not just "close enough" — wet molding leather is one of the most satisfying ways to get there. It looks like a specialty technique, but it only takes a handful of cheap tools you may not have but can be picked up for very little.
In this build, I'm making a custom belt/backpack sheath for my favorite EDC multitool, using nothing more exotic than leather, cellophane wrap, a couple of vacuum-seal bags, a hand pump, and my oven.
What You'll Need
Vegetable-tanned (veg tan) leather, roughly 1.8–2mm thick
Cellophane wrap
Cheap air-tight vacuum/suction bags + a hand pump
An oven
Basic leatherworking tools (cutting mat, edge beveler, stitching irons, thread, burnishing agent, glue)
The object you're molding around (in this case, a multitool)
A quick note before you start: this technique shines with vegetable-tanned leather specifically. Chrome-tanned or other soft, "souple" leathers won't hold the shape the same way, so results will vary if you substitute.
Step 1: Cut and Soak Your Leather
Start by cutting a piece of leather noticeably larger than your finished piece will need to be. You'll lose some to trimming later, but it's worth the buffer — it's much easier to cut down oversized leather than to stretch a piece that came up short.
Once cut, soak the leather thoroughly in water. If you're working with thicker leather, fully submerging it for 5–10 minutes gives it enough time to soften all the way through.
Step 2: Protect Your Tool and Set Up the Mold
Wrap the object you're molding — in this case, the multitool — in a couple of light layers of cellophane. Keep it thin; you don't want to add bulk that will throw off the final fit.
Place something rigid, like a cutting mat or a small board, inside your vacuum bag as a backing plate. This gives the leather something solid to press against. Set your wrapped tool on top of the backing plate, then lay the wet leather over everything.
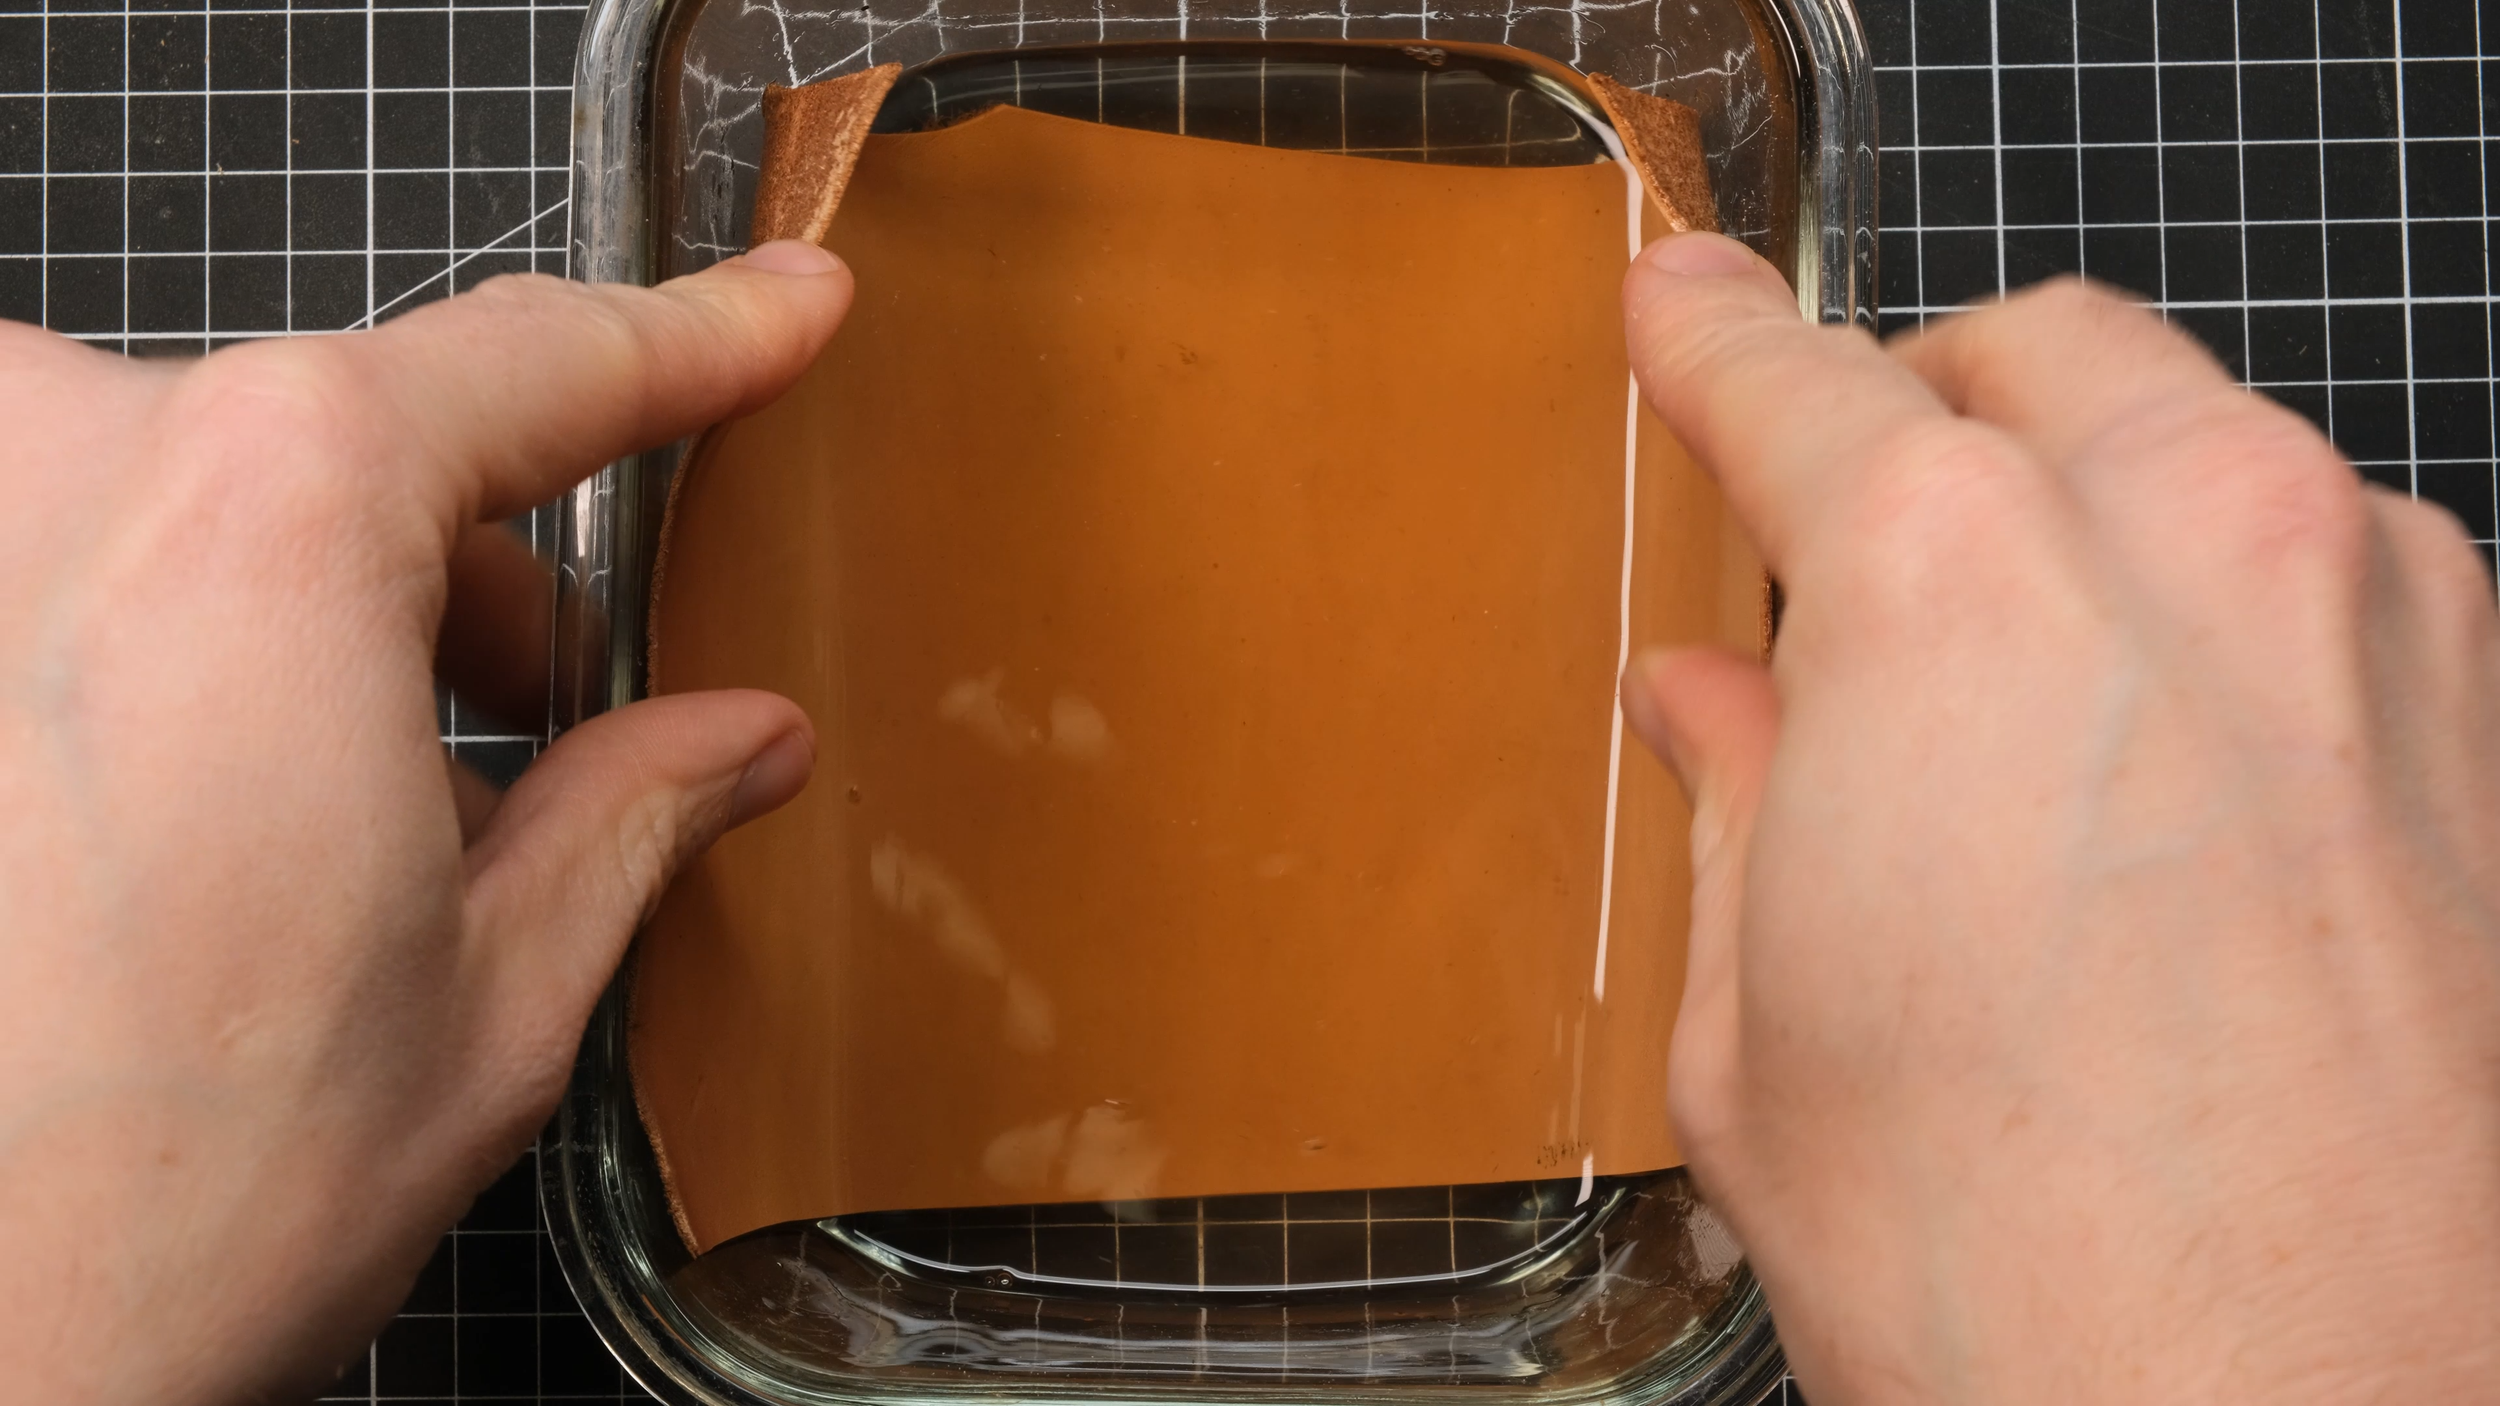
Let the leather soak for up to 10 minutes if needed.
Step 3: Vacuum Seal and Shape
This is the slowest part of the process — and the most important. As you draw the air out of the bag, the leather gets pulled tight against the shape of your tool. Once most of the air is gone, use your fingers or a bone folder to gently press the leather into any details you want captured more precisely. Take your time here; you can repeat this pressing process as many times as needed.
Don't be surprised if you go through a bag or two — cheap vacuum bags can leak or fail under repeated pressure. They're inexpensive enough that it's not a big setback, but it's worth having a few spares on hand before you start.
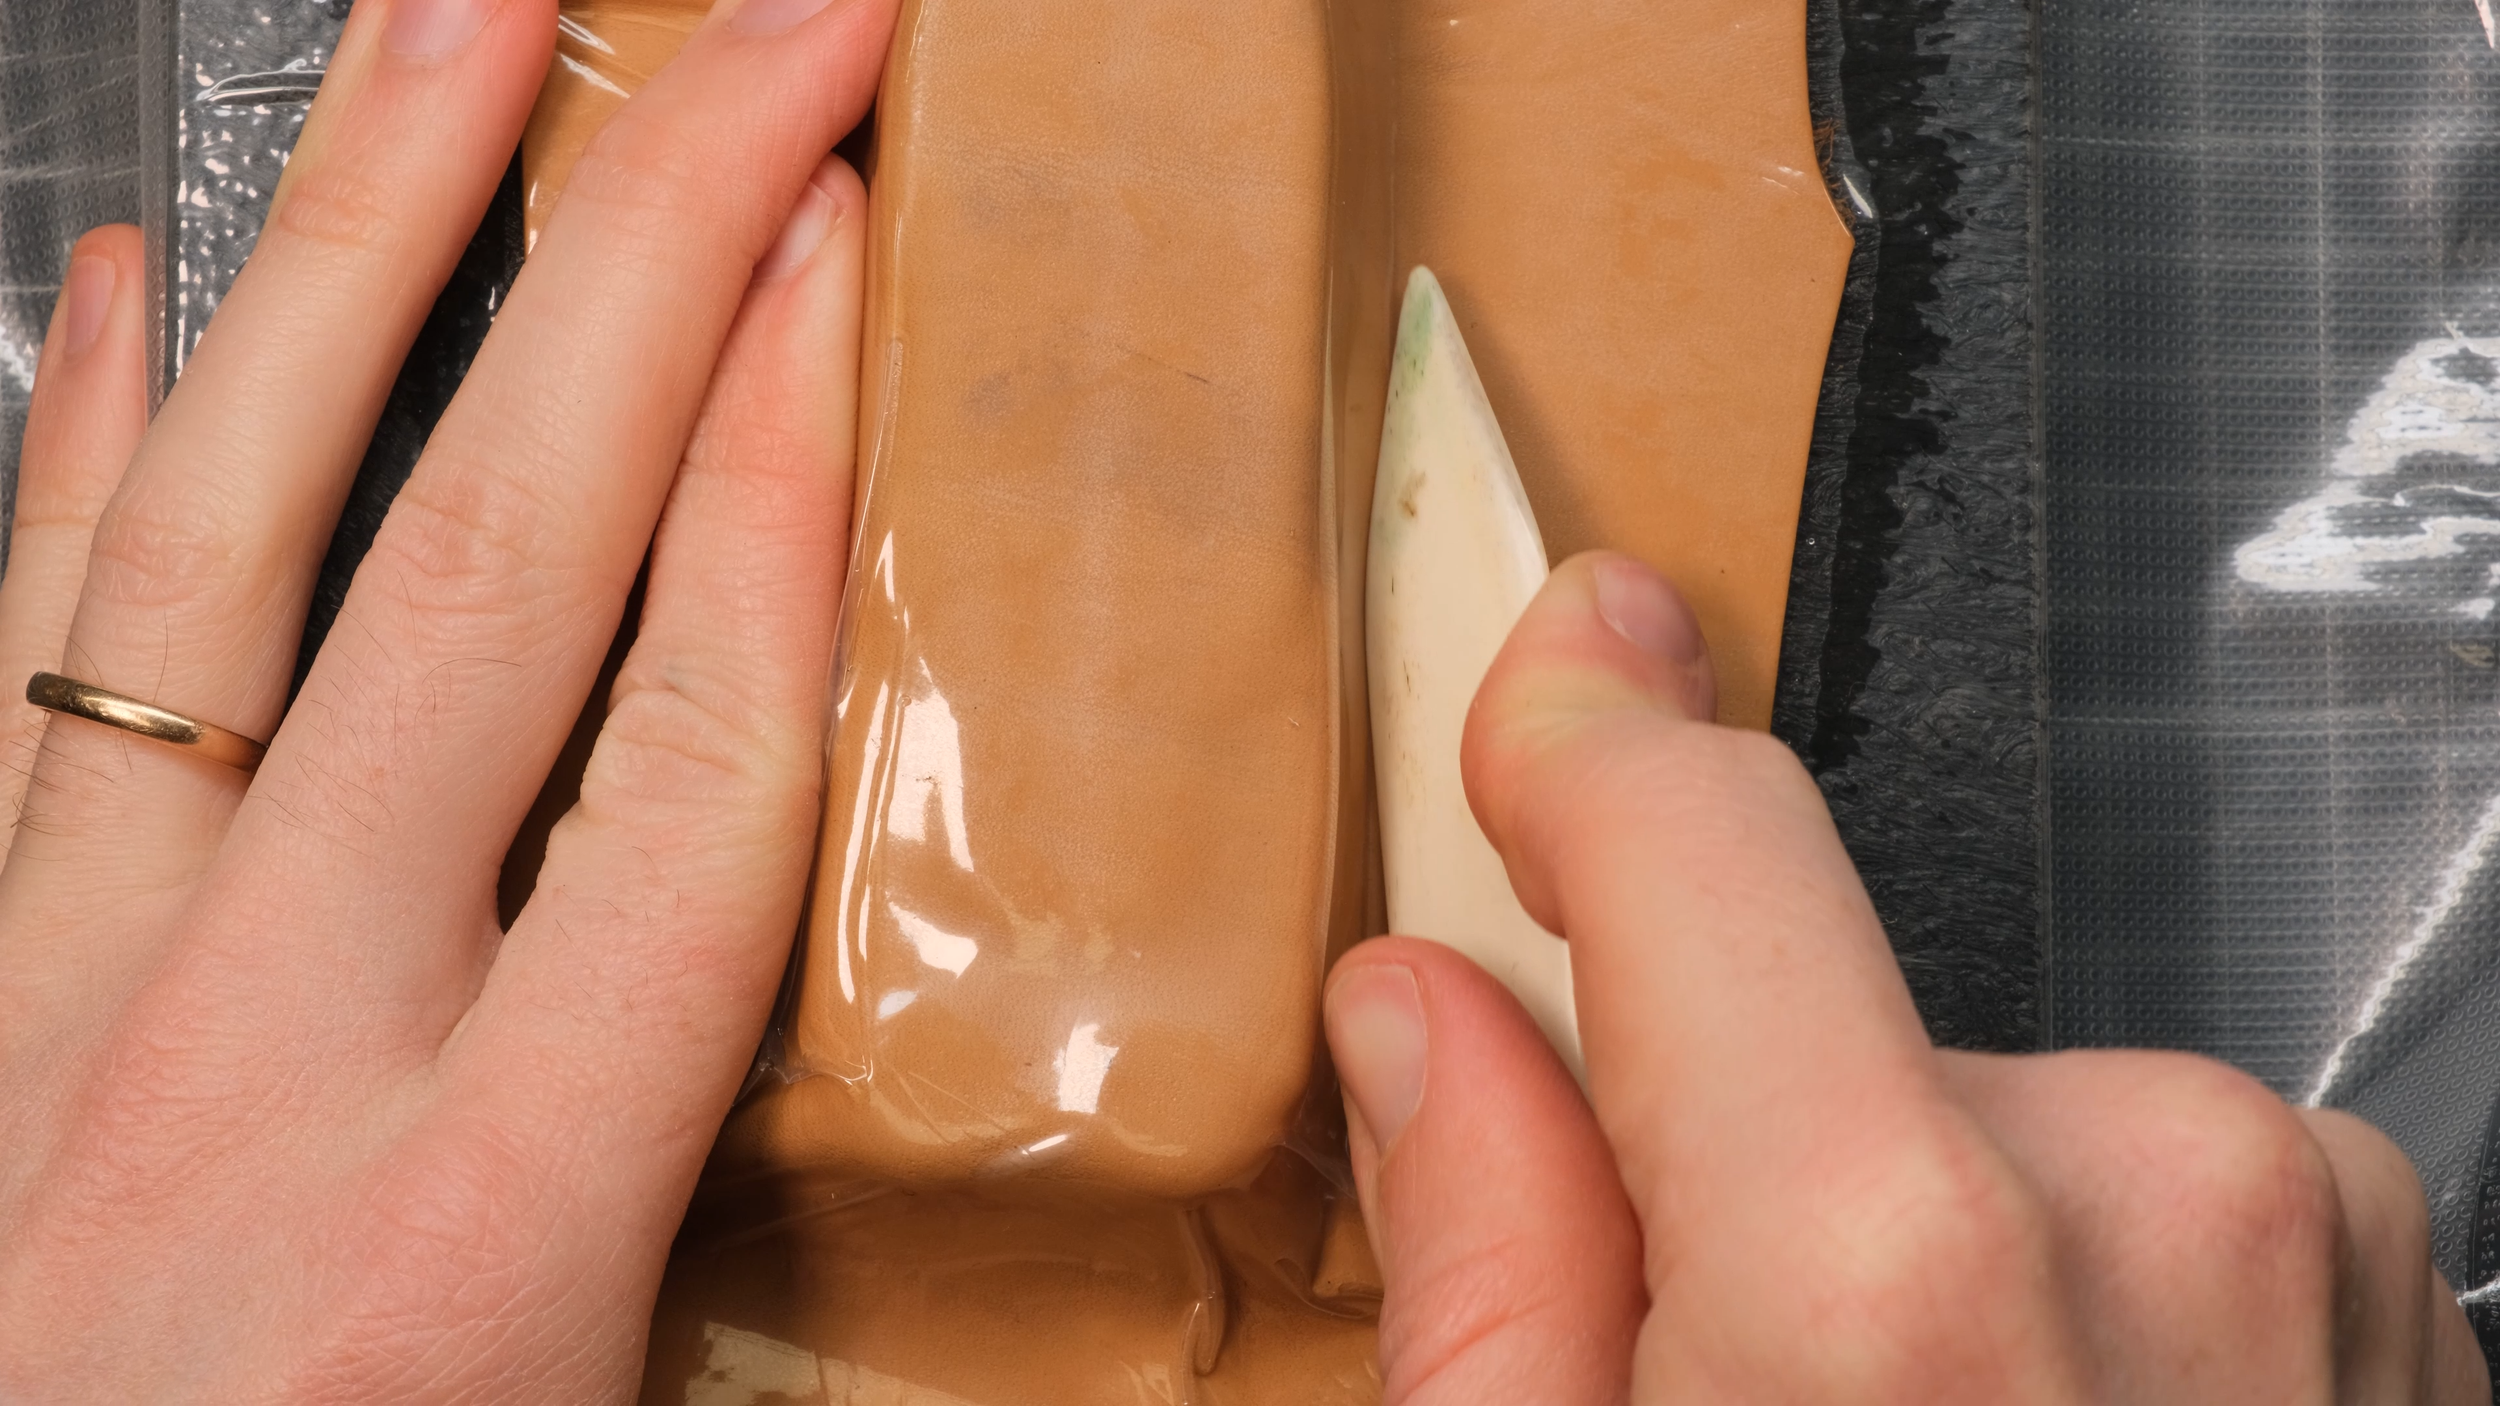
Take your time shaping the leather as required while in the bag.
Step 4: Bake to Set the Shape
Once you're happy with the shape, carefully transfer the leather onto a baking tray without disturbing the form you've created. Bake it at around 80°C (176°F) for 10–20 minutes to drive out the moisture.
Check on it regularly. Overcooking will cause the leather to shrink and become brittle, which can ruin all the shaping work you just did. As the moisture evaporates, the leather's fibers contract and harden in place, locking in the mold — think of it as leather's own version of case hardening.
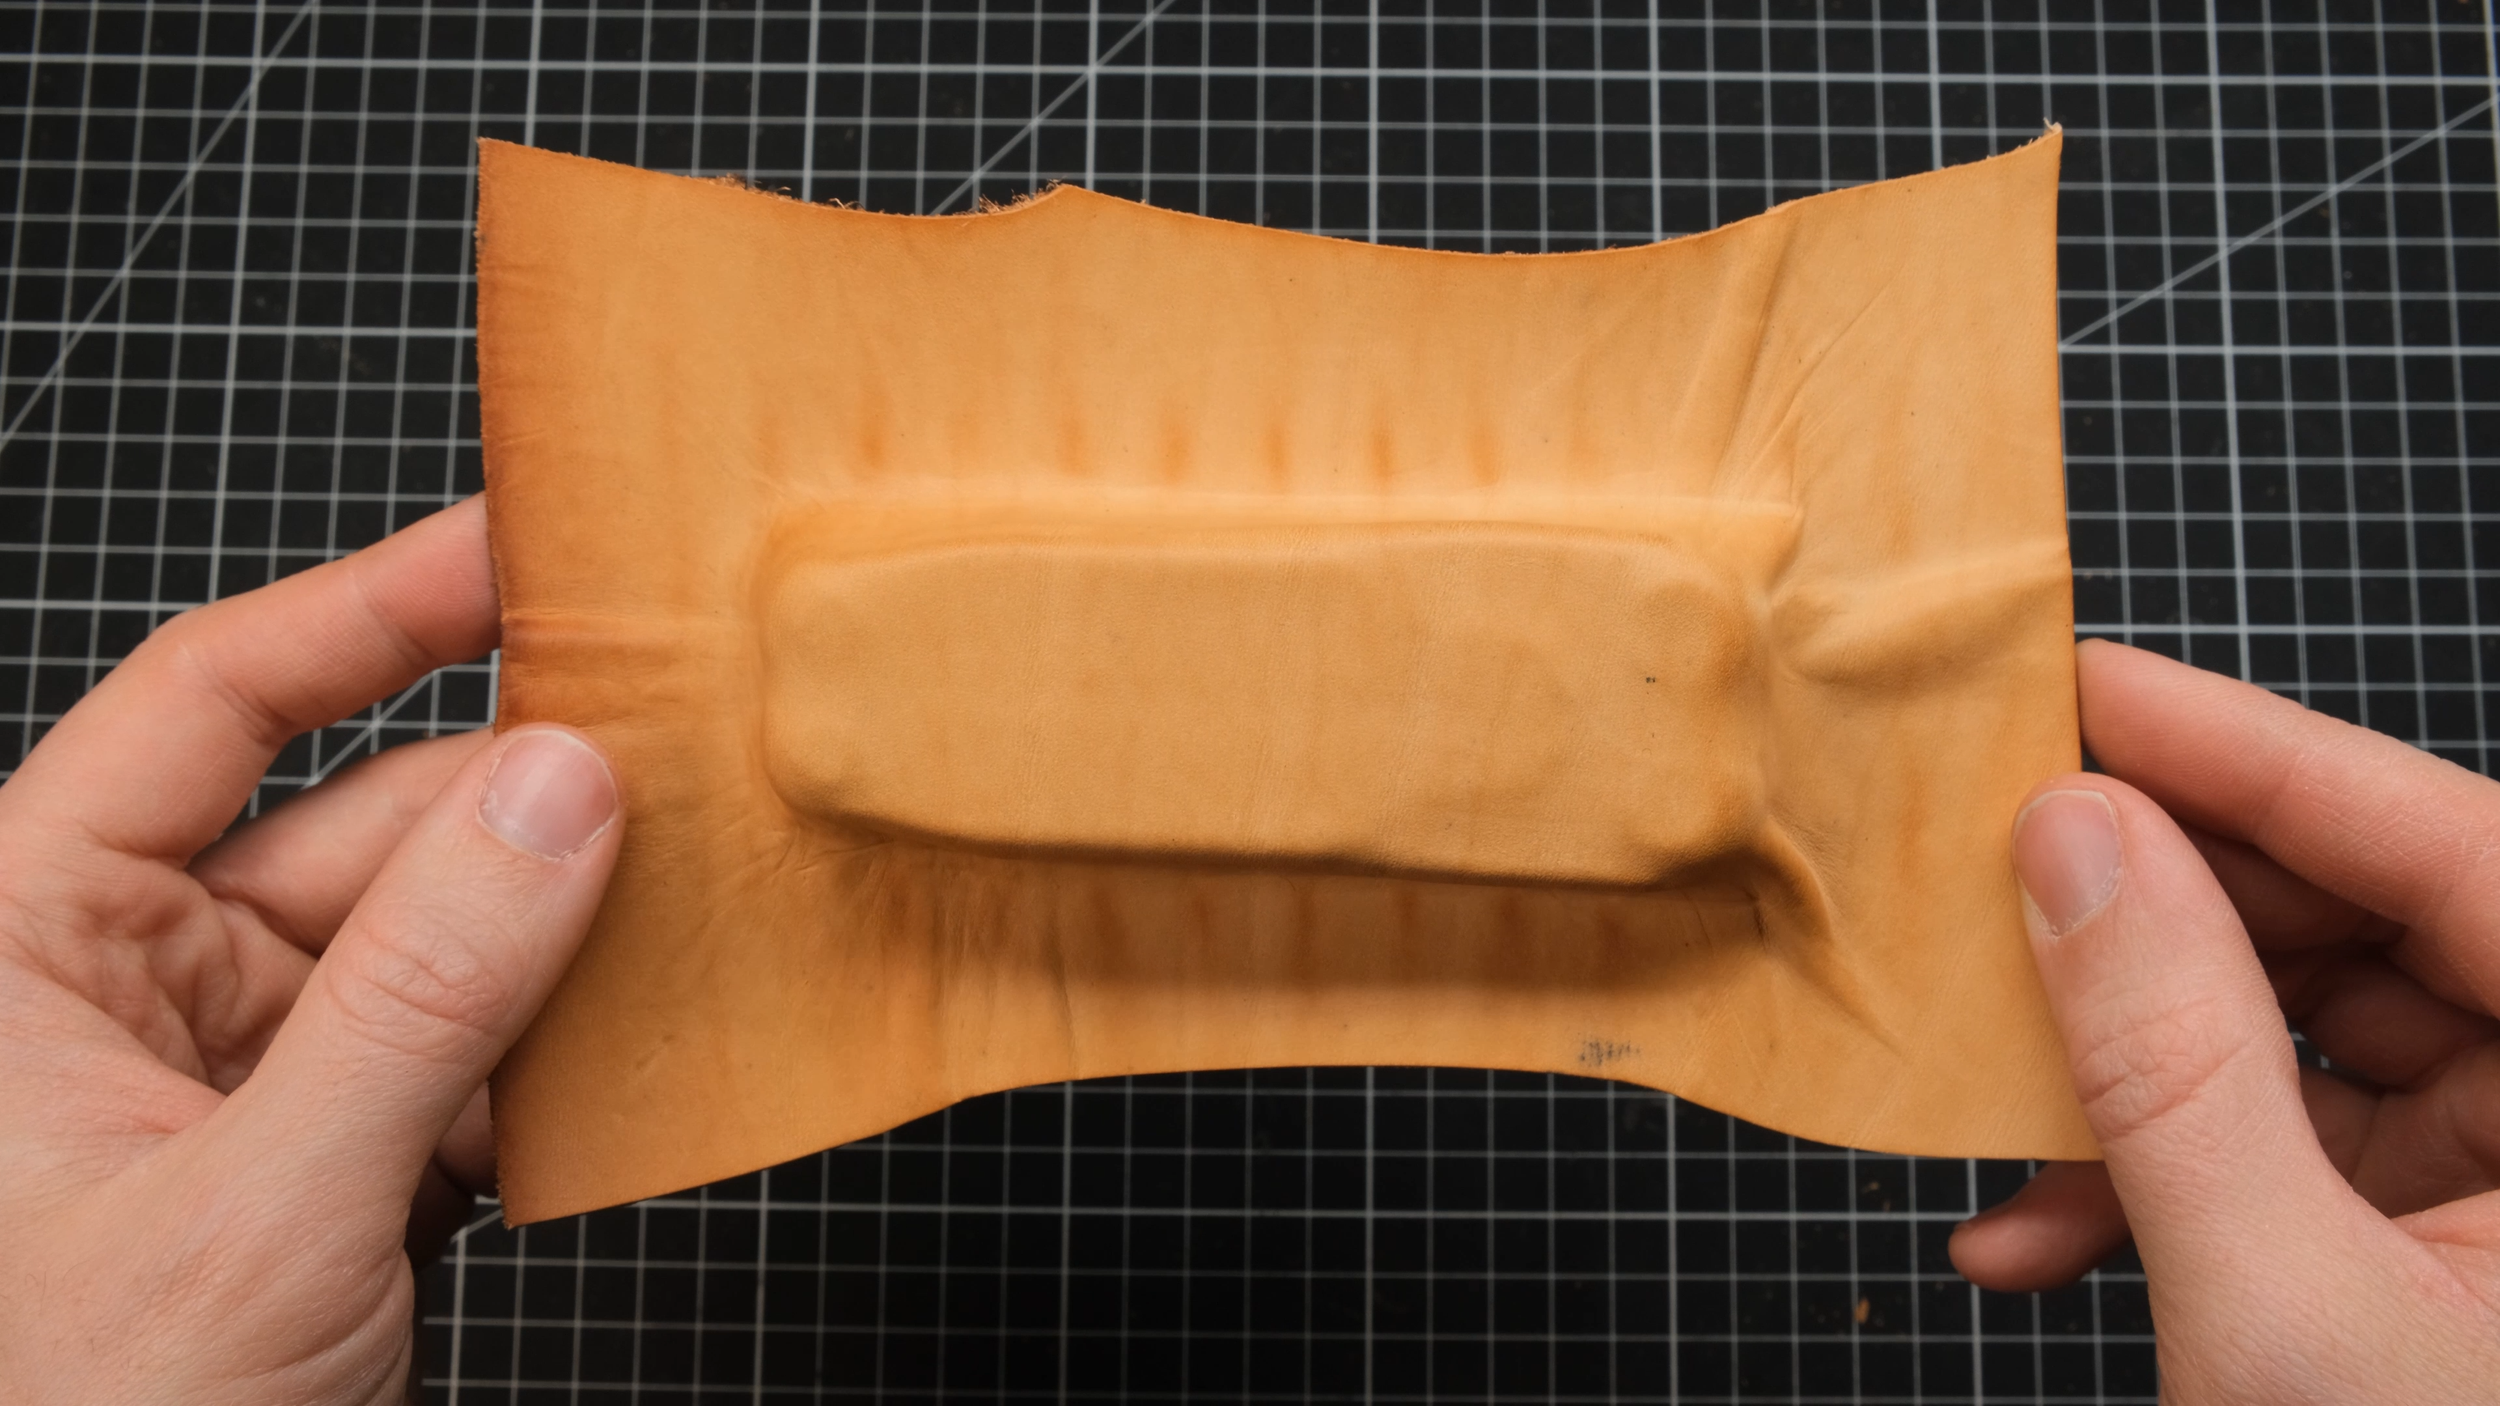
Your leather should be hard and firm and hold the shape well after baking.
Step 5: Trim and Shape the Front Piece
Once out of the oven, the leather will be noticeably stiff, with the shape of the tool clearly embossed into it. From here, trim off the excess material and shape the top opening.
A generous cutout at the top makes a real difference in usability — without it, pulling the tool out quickly becomes awkward. This is also the best time to bevel and burnish these edges, since it will be much harder to access them cleanly later in the build. A burnishing agent like tokonole works well here, both for finishing the edge and protecting the inner fibers where the tool will rub against the leather.
Step 6: Build the Back Panel and Clip
Cut a rough shape for the back and flap portion from the same leather. Test-fit a metal belt clip, then punch a slot for it, glue it in place, and set a rivet to lock it down permanently.
Since you don't want the tool sliding directly against metal, prepare a liner piece of leather to sit between the clip and the tool. Skive down the top edge of this liner as thin as possible before gluing it in with neoprene cement glue, and skive the bottom edge too so it doesn't catch on the tool during removal.
Bevel and burnish all the top edges at this stage while everything is still easy to reach.
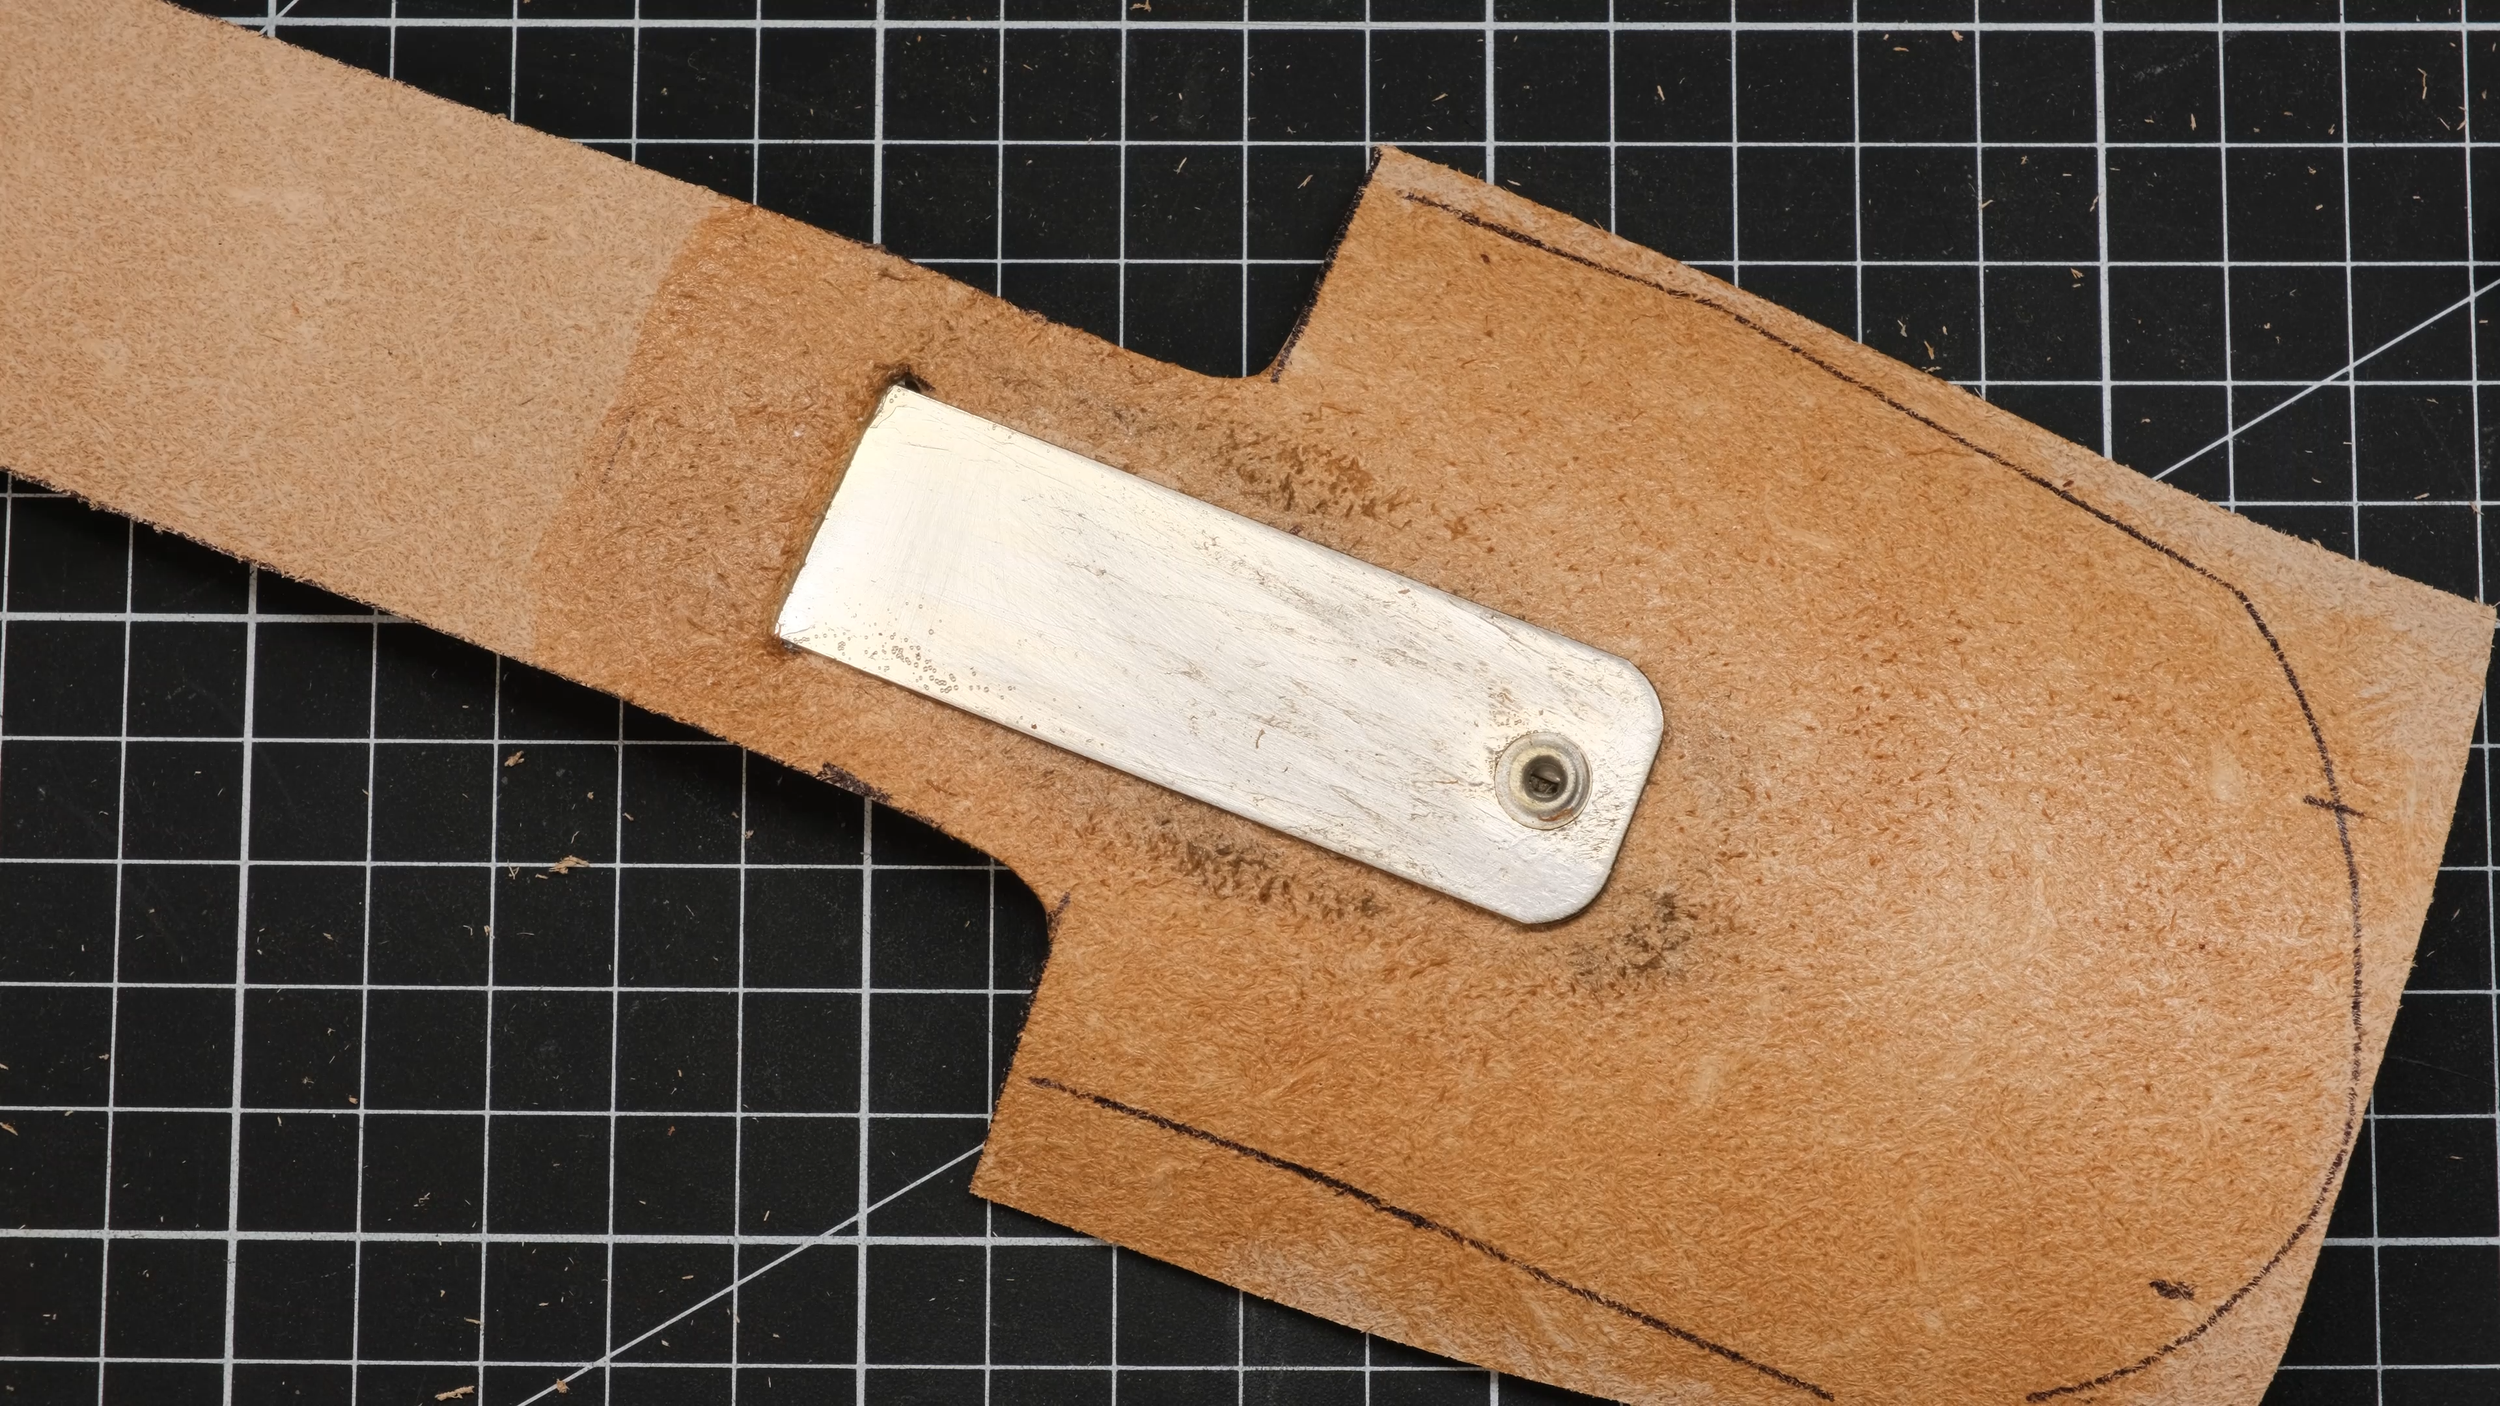
Prepare the backside of the sheath with an included belt clip.
Step 7: Glue and Stitch
Dry-fit the two halves, mark your positioning and the outline of the tool, then rough up the surface of the liner so the cement glue has something to grip. With neoprene cement, apply it to both surfaces and let it go tacky or very nearly dry before pressing the pieces together — this is what gives you a strong, lasting bond.
One important planning note: add any closing hardware (snaps, clasps, etc.) before gluing the two halves together. Trying to add it afterward is far more difficult.
For stitching, follow the inner curve of the piece — closely, but not so closely that the stitching pulls the opening tighter than intended, which can make the final fit too snug.
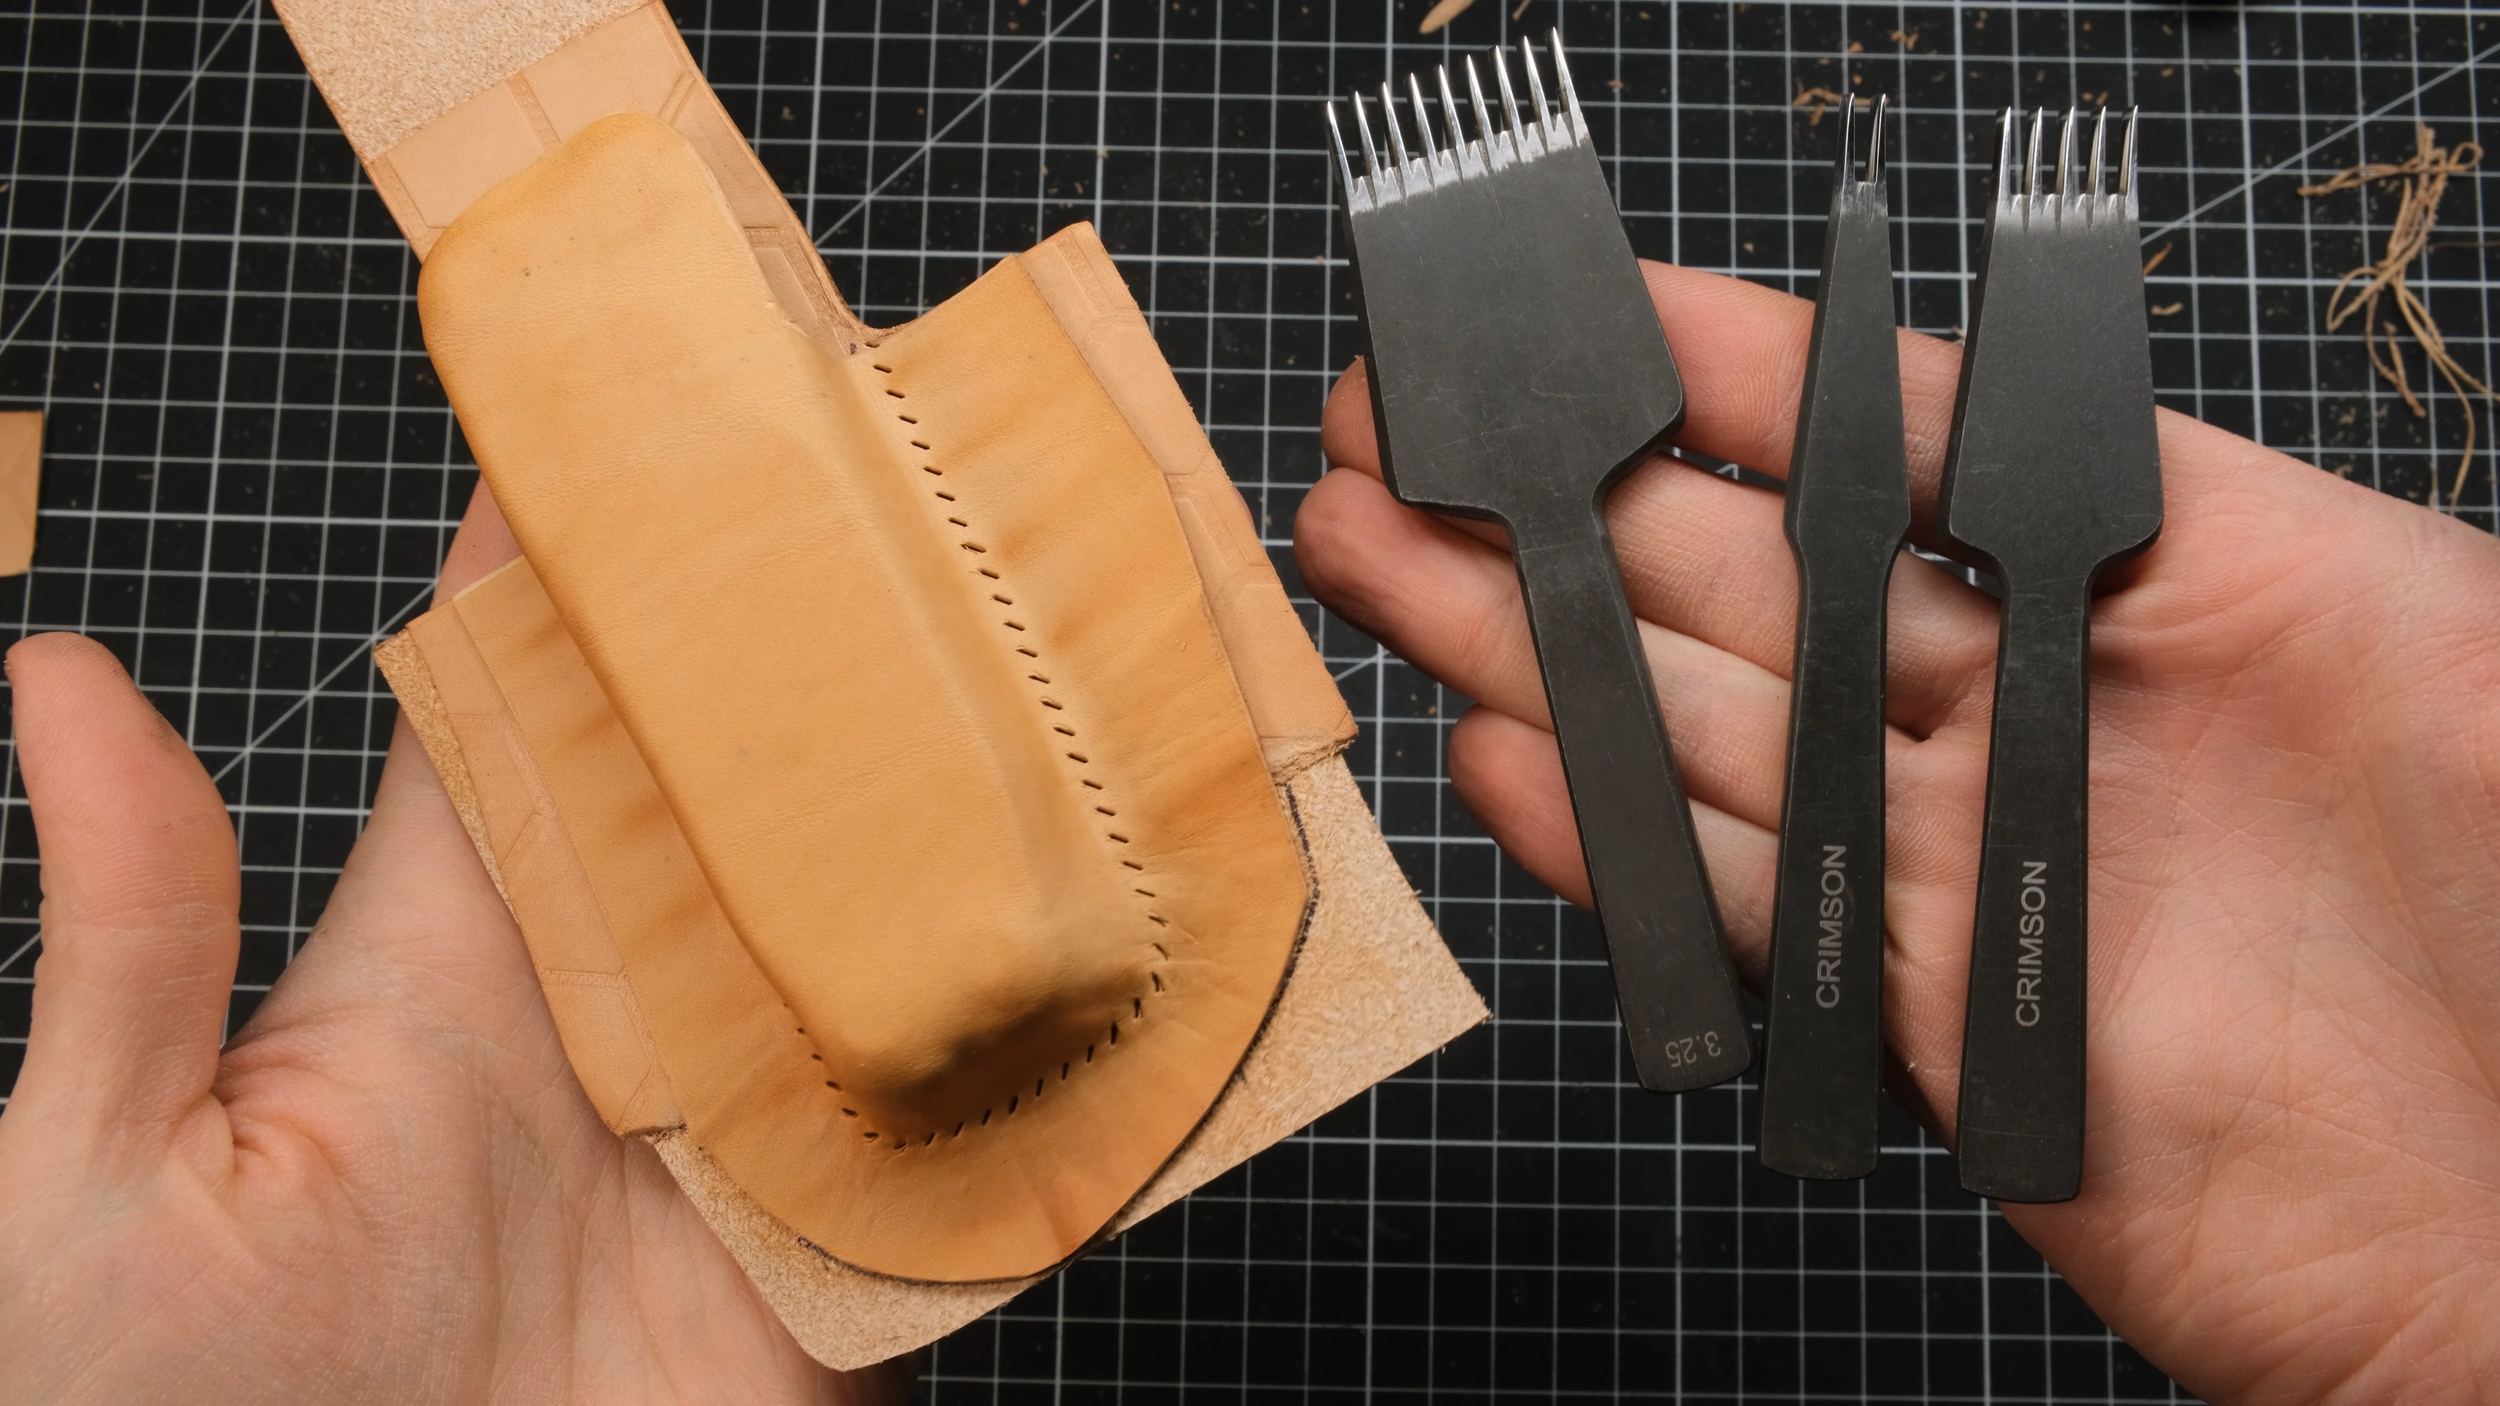
I love using the Crimson Hides French tip stitching irons.
Step 8: Trim, Bevel, and Finish
Carefully trim the excess leather flush against the stitch line. This step takes patience — the leather is hard from the baking process, and a slip here can mean redoing the entire piece. Once trimmed, clean the edges with sandpaper, then bevel and burnish them for durability.
Step 9: Test the Fit and Finish Up
Slide the tool into the finished sheath. It should sit snugly, with the fit only improving as the leather breaks in over time. Finish the closing snap on the main body, complete the flap, and finally, apply a good coat of leather conditioner over the entire piece — inside and out. This step matters more than it might seem: it keeps the baked leather supple enough to hold up to daily use instead of drying out and cracking.
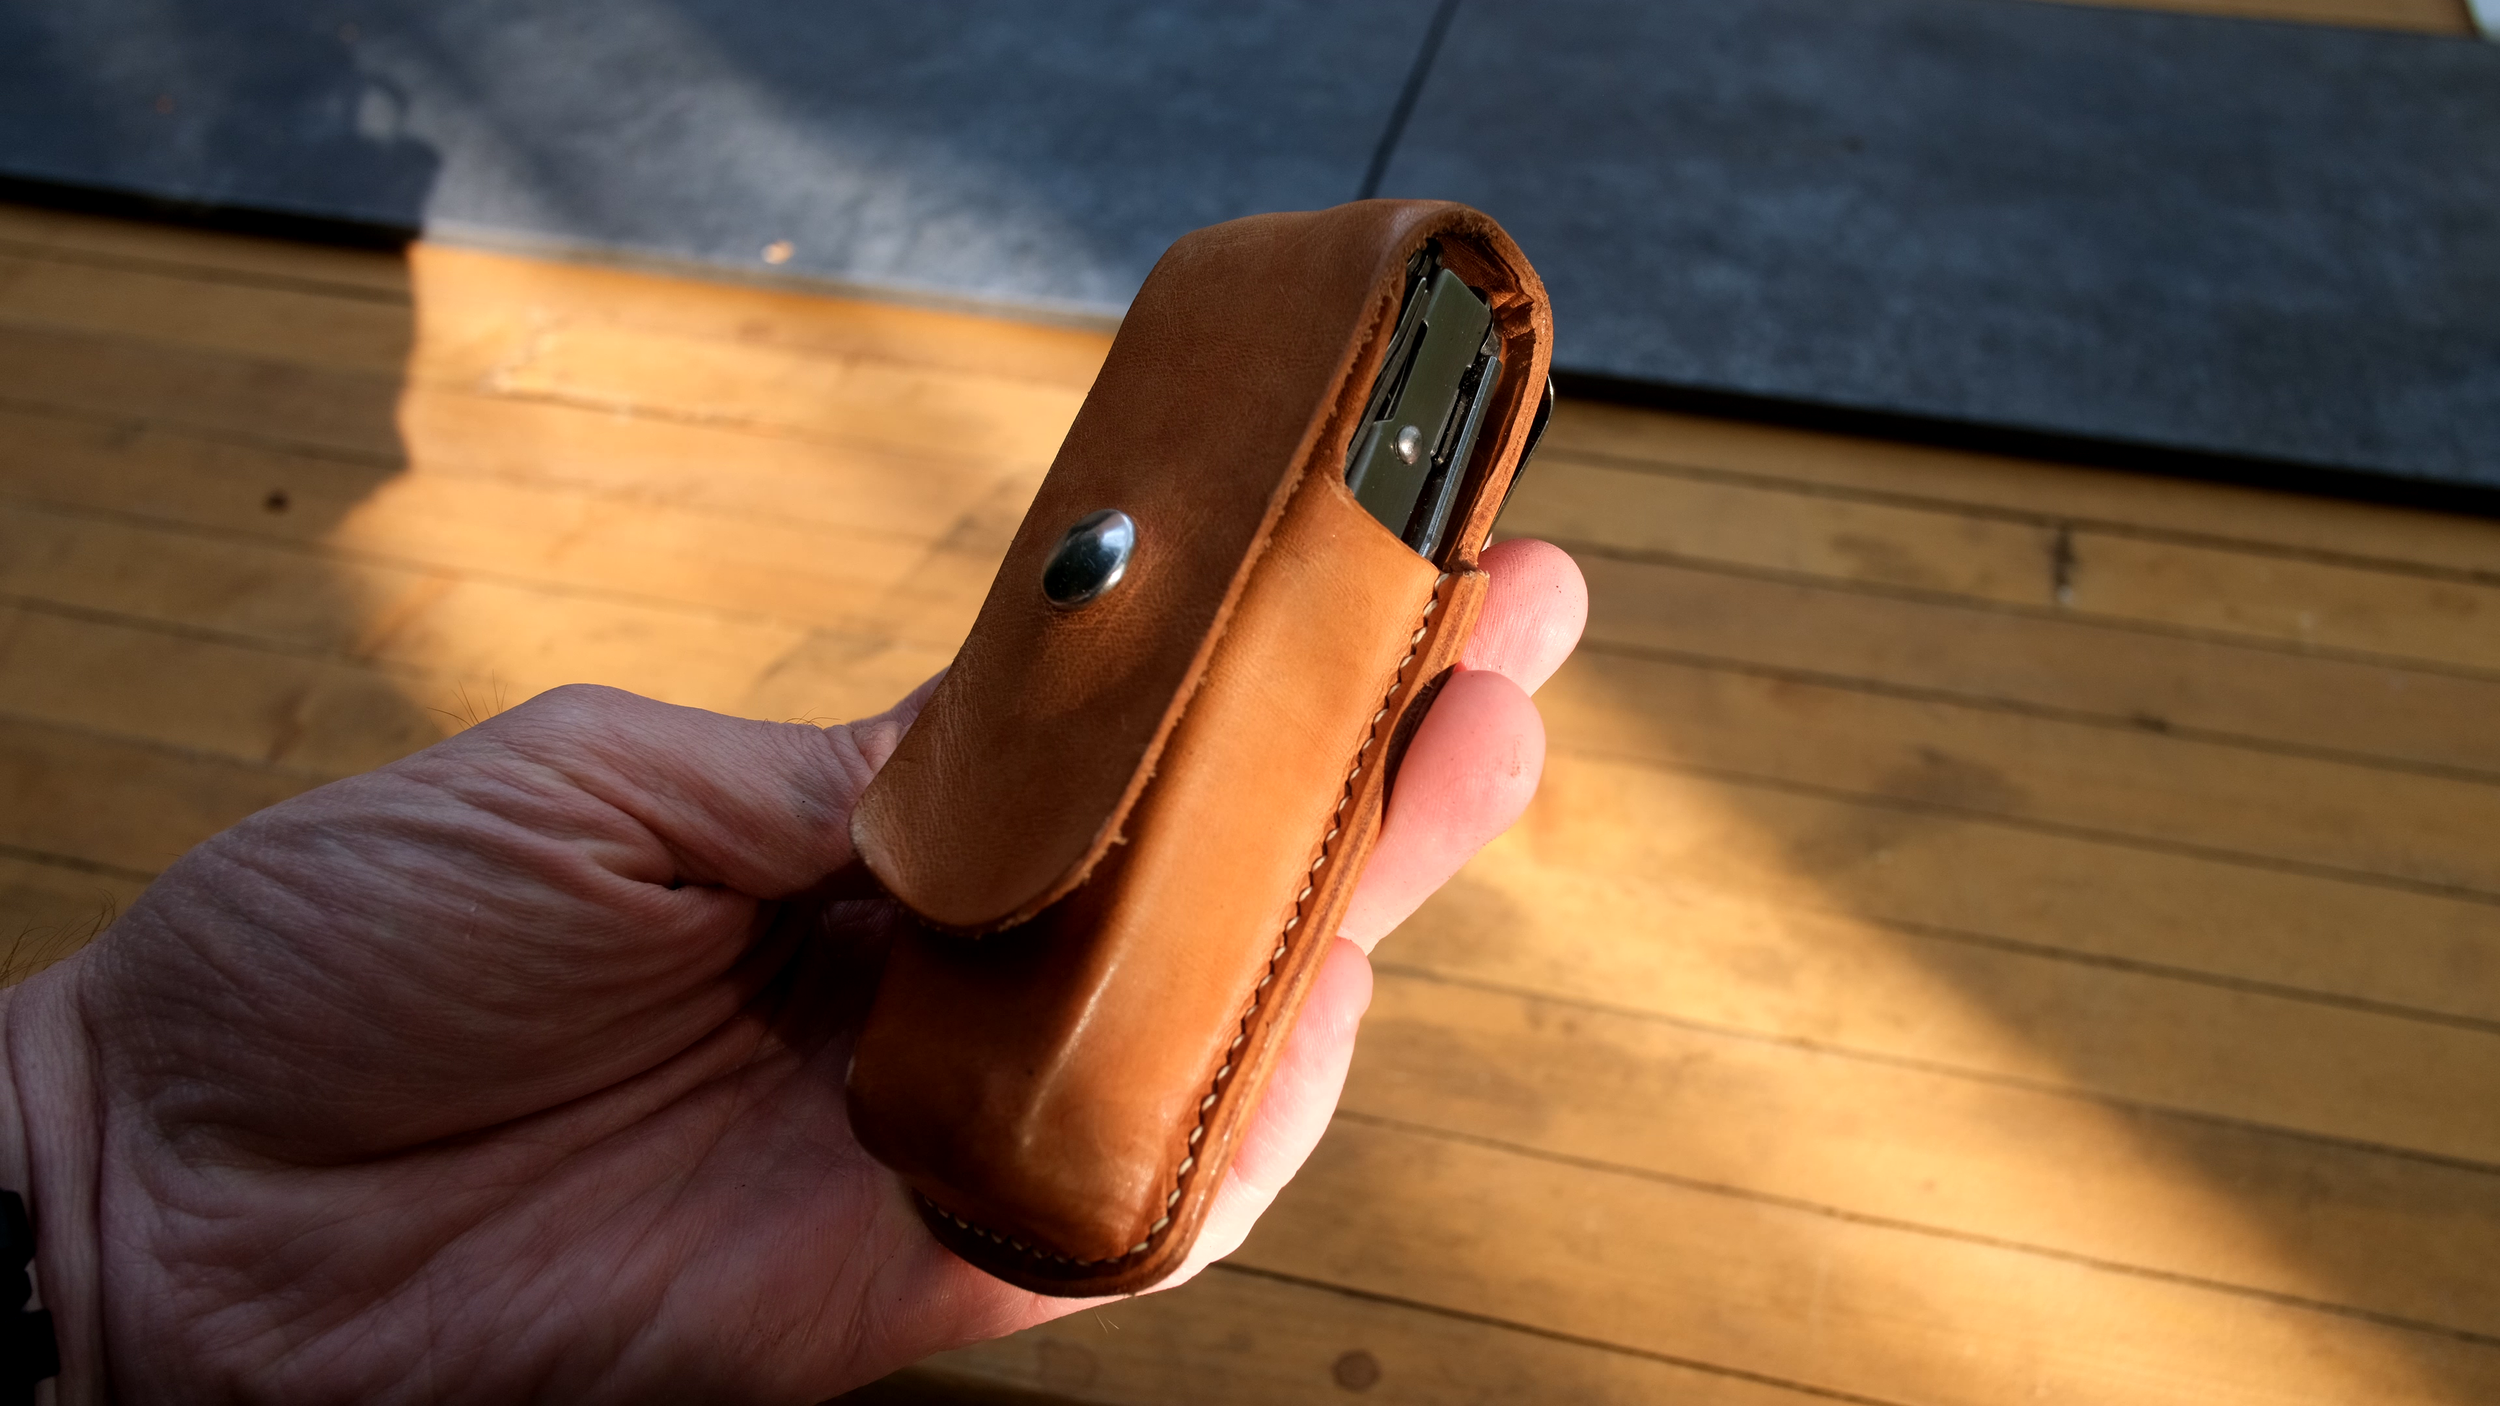
Your Sheath should now have the perfect shape for your tool!
Final Thoughts
Wet molding is one of those techniques that looks intimidating until you actually try it — at which point it mostly comes down to patience during the vacuum-sealing stage and careful temperature control in the oven. Once you've got both dialed in, you can mold leather around almost any object with a reasonably defined shape.
If you build your own version, I'd love to see how it turns out.