Messenger style leather backpack - January 2018
Full build video at the and of the article
It took me a few months to feel comfortable enough to start this project - it was my most ambitious project to date and was already costing me more than anything else I had made to that point (good leather is expensive).
But eventually I got down to it, grabbed a pencil and a sheet of paper and started drawing what I thought would be my dream bag!

A modern twist on a classic design
Building for me, for once!
So what did I want in this bag?
I needed it to be quite small, just big enough for a 13inc laptop, with an easy opening and a quick access pocket at the front. So far so good.
I also wanted it to be really sturdy and resist anything I would throw at it over the years. For that I chose to work with 2,5mm vegetable tanned leather, some of the nicest material I could possibly want in a bag. I also decided to go with some quick open carabiners that are originally used in sailing as this would provide a great stylized opening clasp as well as be tremendously practical to get into.
The stitching would be done by hand of course, using the traditional saddle-stitch. I went for this for two reasons, the main being that I don’t own a sewing machine, so anything else was out of the question. The second reason I love this stitch method is of how strong it is and how good it looks - but that’s a topic for another time. The thread was (and still is) 0,8mm waxed polyester thread which I now find too thick for most things though it worked well in this build.
Finally, the design.
I wanted this bag to be elegant but with an obviously stylized design. I wanted it to be classic with a touch of modern. And overall, an understanded conversation starter!
Did I achieve that?
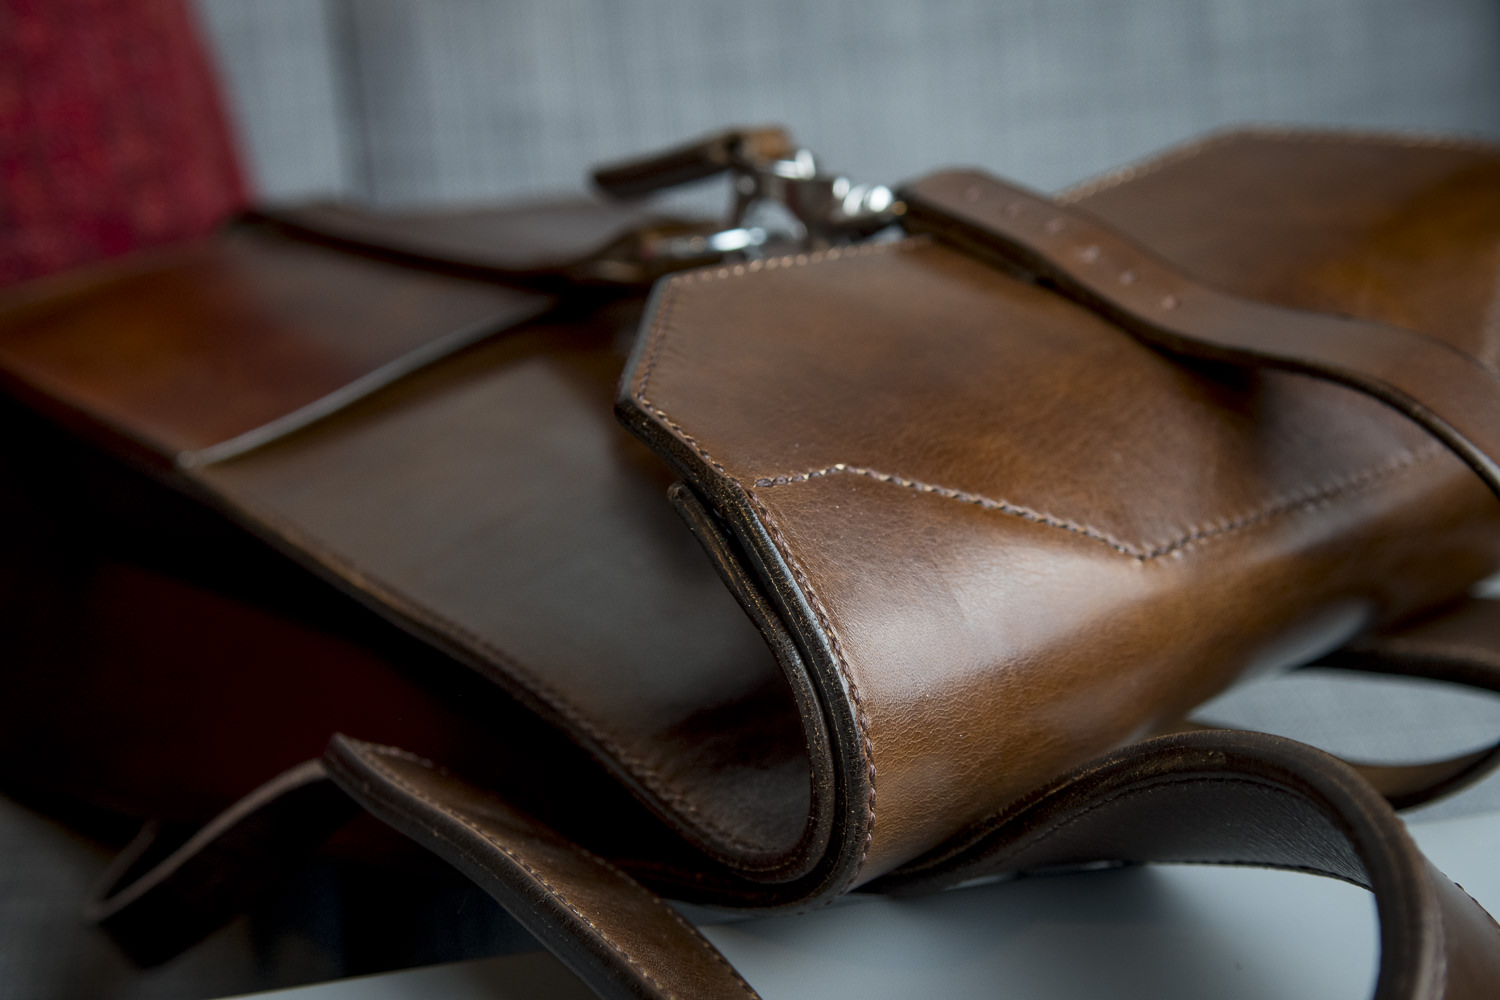
Using stitching to outline shapes
The Build
Dying the leather
Since the leather I had chosen was a natural vegetable tanned cow leather, it came in the regular cream-white sckin color so often found in natural leathers. I would need to dye the leather before I could proceed.
Here is my usual dying process:
(if applicable) clean the leather using a light coat of pure alcohol
Apply a light coat of neatsfoot oil to the leather
I use Fiebing’s 100% pure neatsfoot oil
This helps nurish potentialy dry leather befor the dye process which will dry it out
In theaory, the oils also create a pathway for the dye to penetrate better (though I can’t say I’ve reallly noticed this)
Apply the dye in several coats, the first being small circles, then horizontal lines, then in vertical lines
I will go into more details on my dying process in a future post (stay tuned ;)).
All the other stuff
Once the leather was dyed, I traced the outline of all the pieces I needed and started cutting, beveling and burnishing the edges that needed it and overall assembling the bag.
I won’t go into all the assembly steps since I have better things to do with my life than write them down and you probably would prefer just watching the video I made about this below. Drop me a comment if I’m wrong on that.

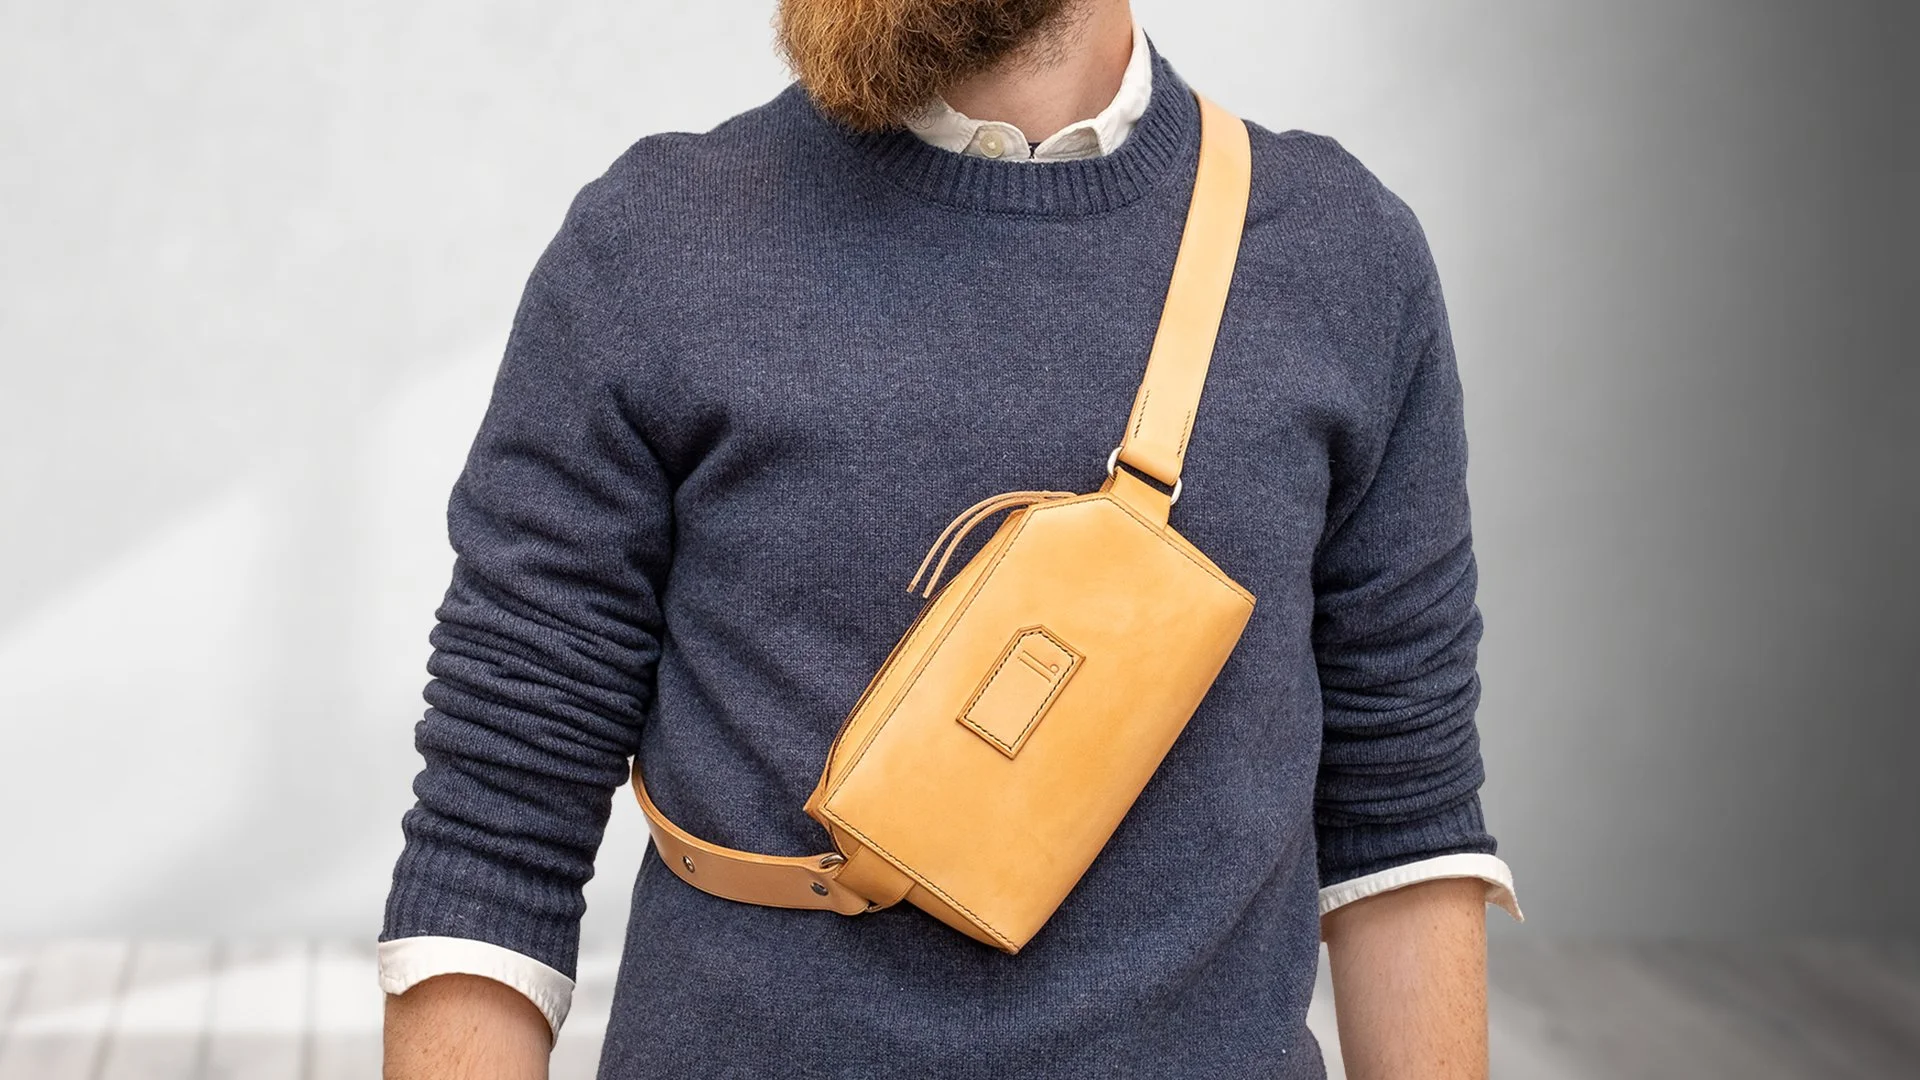
Perfect as an every day carry backpack
What did I learn?
First of all, I learnt that even if you’ve never done anything like this before, you can do it if you plan enough!
Secondly I learnt that cheap pricking irons can do miracles, but they’ll be next to impossible to remove from 3 layers of 2,5mm thick vegtan leather… many people have suggested rubbing the prongs of the pricking irons on beezwax and, though I’m sure it would help, simply won’t overcome the fact that cheap tools can only do so much. Don’t get me wrong though, cheap tools are often the best tools if it means you get hooked in a craft, the proof being that I managed it in the end!
Thirdly, you really need to figure out how you are going to attach your straps. In my case I simply stitched the end of the strap straight to the back of the bag, a bulky and somewhat uncomfortable arrangement that makes the straps feel stiffer than they are (and they’re pretty stiff to start off with). Moreover, the straps were stitched parallel to each other, not taking into account the normal direction you want straps going in: if you look at most bags the straps will go out at an angle to accommodate for the shape of your back and shoulders.
An last but not least, a front pocket is great in a pinch, but not being able to close it was a big mistake. Not only does it catch any rain and dirt that hits the bag but it’s also a great way of getting your stuff stolen by pickpockets in the Parisian metro!
I will not be making those mistakes again (probably).

Simple and elegant design
Conclusion
I love this backpack.
I barely ever use it nowadays and it spends most of its time in a box at the back of my wardrobe. But I love this piece as it reminds me that I can make what I want. I have given myself the means to work leather to a degree I am satisfied with, where I can see a bag I like and simply make my own version of it incorporating those small (or big) design elements that make it truly my own.
I have a long way to go still and this bag has a ton of issues with it, but I love it nonetheless.
Please check out the build video below where I go into great detail about how it was built and drop me a message to tell me what you thought of it :)
Keep crafting!
James Berry aka Le French Crafter
![[REVIEW] Stitching iron set by Buckleguy & Corther leather](https://images.squarespace-cdn.com/content/v1/56ff9bdd01dbae8fc9b1967c/1694034507251-C3NQT7HGQEE9I6SI0ITB/DSCF1896-2.jpg)
![Make your first shoes with Sneakerkit [REVIEW]](https://images.squarespace-cdn.com/content/v1/56ff9bdd01dbae8fc9b1967c/1673593943685-5C7EJ7H5YWYREHA6KDNI/311598551_1686096755117298_116181593450279350_n.jpg)
![Best pattern knife, Little King Goods or Kemovan Craft Tools? [REVIEW]](https://images.squarespace-cdn.com/content/v1/56ff9bdd01dbae8fc9b1967c/1660389389574-ZOF293FMKONQ64832IKI/Blog-vignette-2.jpg)
![[REVIEW] Radermecker Niagara vegtan leather](https://images.squarespace-cdn.com/content/v1/56ff9bdd01dbae8fc9b1967c/1656452847717-I0VB18G0LMN4B8J58GOY/Vignette.jpg)


